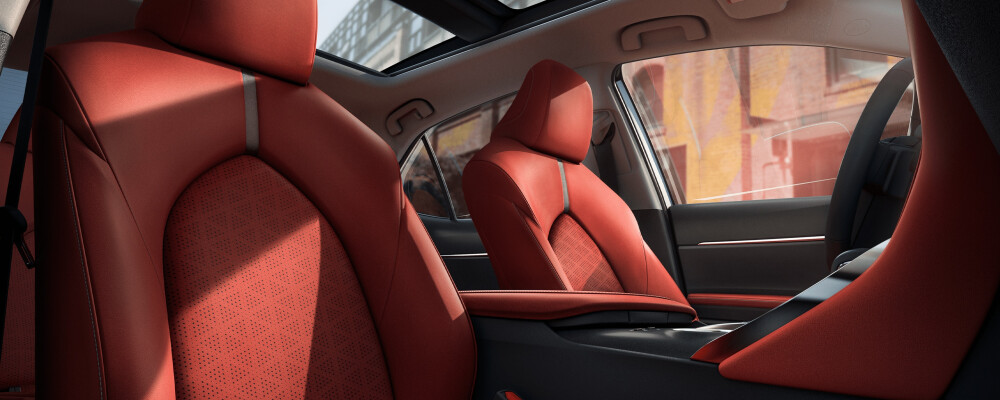
Toyota Camry seats include 2 front seats and 3 rear seats. Compared to some other C-class vehicles, the space in camry is larger.
Front seats
Adjustment procedure
Manual seat
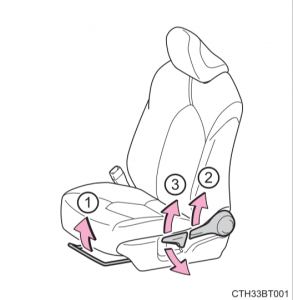
- Seat position adjustment lever
- Seatback angle adjustment lever
- Vertical height adjustment lever
Power seat
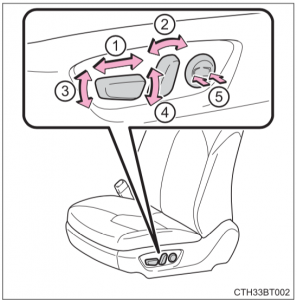
- Seat position adjustment switch
- Seatback angle adjustment switch
- Seat cushion (front) angle adjustment switch
- Vertical height adjustment switch
- Lumbar support adjustment switch (driver’s side only)
WARNING
- When adjusting the seat position
- Take care when adjusting the seat position to ensure that other passen-
gers are not injured by the moving seat. - Do not put your hands under the seat or near the moving parts to avoid injury.
Fingers or hands may become jammed in the seat mechanism. - Make sure to leave enough space around the feet so they do not get stuck.
- Take care when adjusting the seat position to ensure that other passen-
- Seat adjustment
- Be careful that the seat does not hit passengers or luggage.
- To reduce the risk of sliding under the lap belt during a collision, do not recline the seat more than necessary.
If the seat is too reclined, the lap belt may slide past the hips and apply restraint forces directly to the abdomen, or your neck may contact the shoulder belt, increasing the risk of death or serious injury in the event of an accident.
Adjustments should not be made while driving as the seat may unexpectedly move and cause the driver to lose control of the vehicle. - Manual seat only: After adjusting the seat, make sure that the seat is locked in position.
- When adjusting a front seat
- When adjusting a front seat, make sure that the head restraint does not contact the headliner. Otherwise, the head restraint and headliner may be damaged.
Rear seats (folding type)
Folding down the rear seatbacks
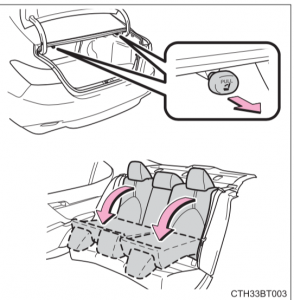
Pull the seatback lever in the trunk for the seatback you wish to fold down and then fold the seatback down.
WARNING
When folding the seatbacks down
Observe the following precautions. Failure to do so may result in death or serious injury.
- Do not fold the seatbacks down while driving.
- Stop the vehicle on level ground, set the parking brake and shift the shift lever to P.
- Do not allow anyone to sit on a folded seatback or in the trunk while driving.
- Do not allow children to enter the trunk.
When returning the seat to its original position
- Ensure that the seat belt does not get caught between or behind the seats.
- If the seat belt has been released from its guide, pass the seat belt through its guide.
Seat adjustment
Be careful not to get hands or feet pinched between the rear console box and the rear seat when folding down the rear seatback.
After returning the seatback to the upright position
Observe the following precautions. Failure to do so may result in death or serious injury.
- Make sure the seatback is securely locked by pressing it forward and rearward on the top.
- Check that the seat belts are not twisted or caught in the seatback.
- Make sure that the seat belt is passed through its guide.
When the right seatback is folded down
Make sure the luggage loaded in the enlarged trunk will not damage the webbing of the rear center seat belt.
Head restraints
Head restraints are provided for all seats.
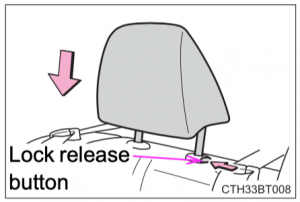
Adjustable type
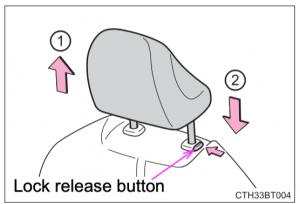
- Up
Pull the head restraint up. - Down
Push the head restraint down while pressing the lock release button.
Integrated type
Head restraints cannot be adjusted or removed.
Removing the head restraints
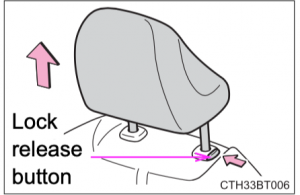
Pull the head restraint up while pressing the lock release button.
Front seats: If the head restraint touches the ceiling, making the removal difficult, change the seat height or angle.
Installing the head restraints
- Front seats
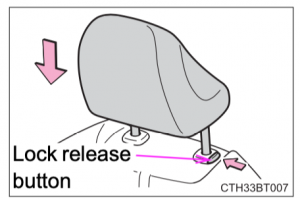
Align the head restraint with the installation holes and push it down to the lock position.
Press and hold the lock release button when lowering the head restraint.
- Rear seats
Align the head restraint with the installation holes and push it down to the lowest lock position while pressing the lock release button.
Adjusting the height of the head restraints
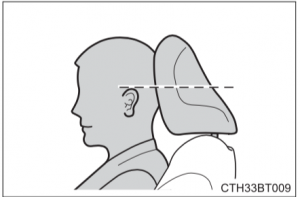
Make sure that the head restraints are adjusted so that the center of the head restraint is closest to the top of your ears.
WARNING
Head restraint precautions
Observe the following precautions regarding the head restraints. Failure to do so may result in death or serious injury.
- Use the head restraints designed for each respective seat.
- Adjust the head restraints to the correct position at all times.
- After adjusting the head restraints, push down on them and make sure they are locked in position.
- Do not drive with the head restraints removed. (However, if a head restraint interferes with installation of a child restraint system, the head restraint can be removed to accommodate the child restraint system: