You may replace the following Toyota Camry Light bulbs yourself. The difficulty level of replacement varies depending on the bulb. If necessary bulb replacement seems difficult to perform, contact your Toyota dealer. For more information about replacing other light bulbs, contact your Toyota dealer.
Preparing for light bulb replacement
Check the wattage of the light bulb to be replaced.
Bulb locations
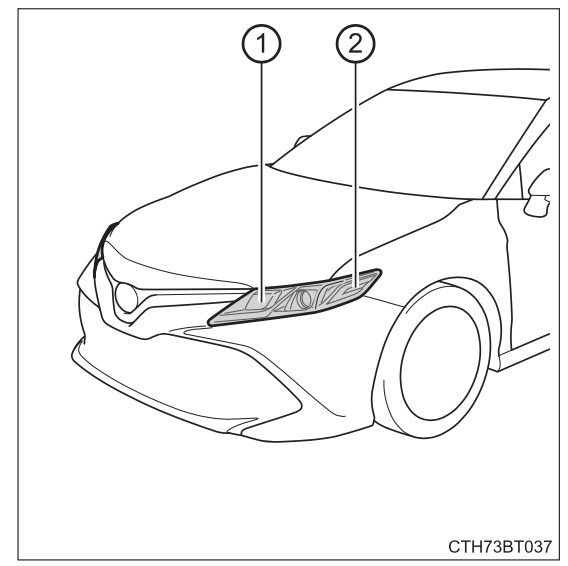
Front
- Front turn signal/parking lights (bulb type)
- Front side marker lights (bulb type)
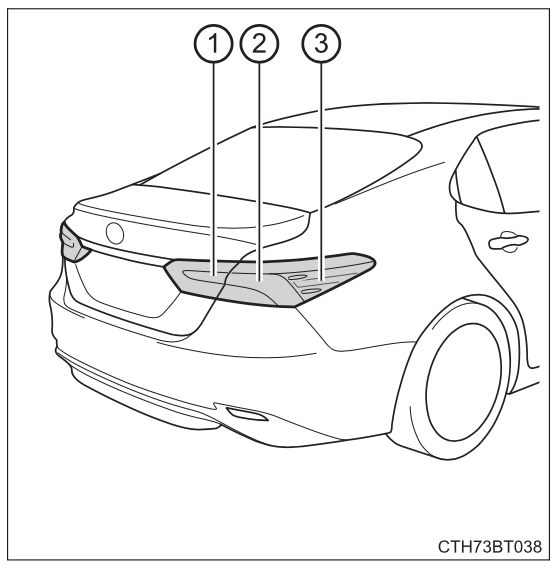

Rear
- Back-up lights (bulb type)
- Rear turn signal lights (bulb type)
- Rear side marker lights (bulb type)
Replacing light bulbs
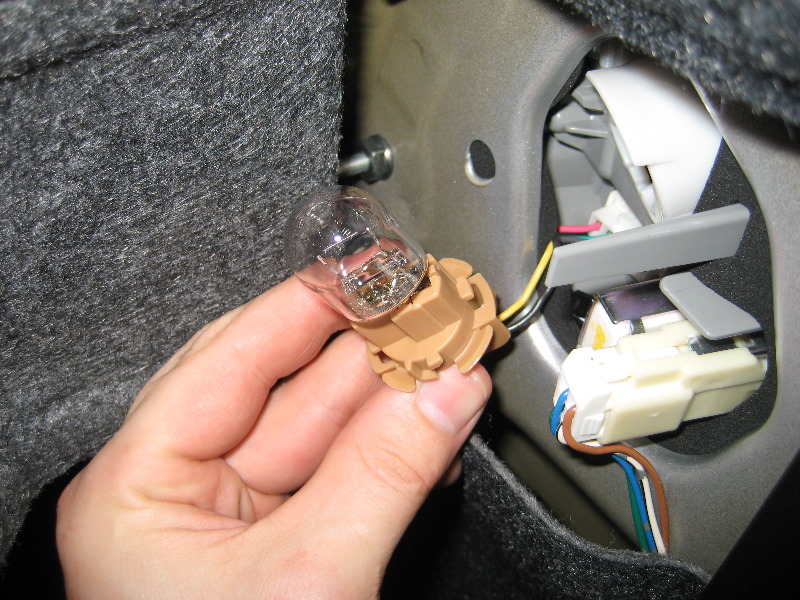
Front turn signal/parking lights (bulb type)
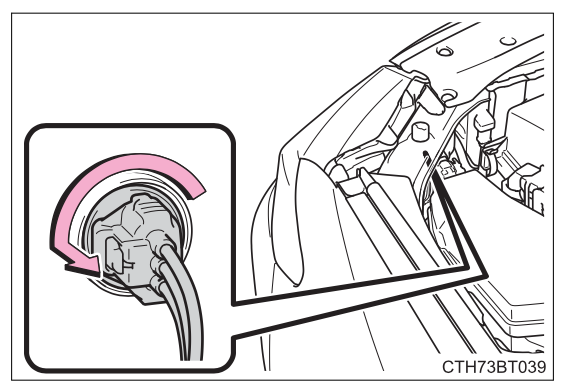
- Turn the bulb base counter clockwise.

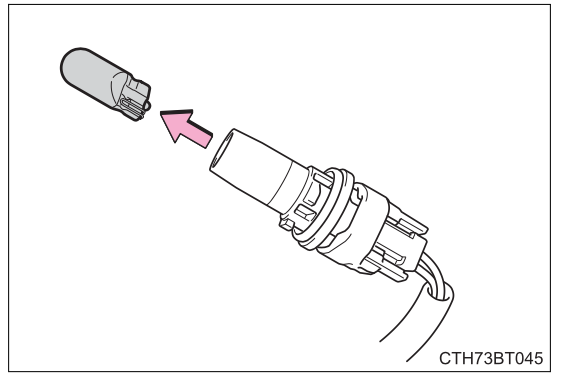
- Remove the light bulb.
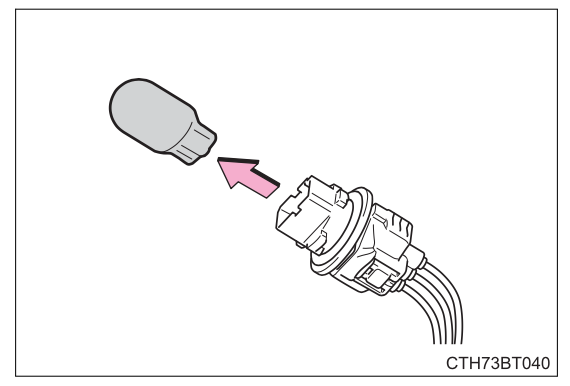

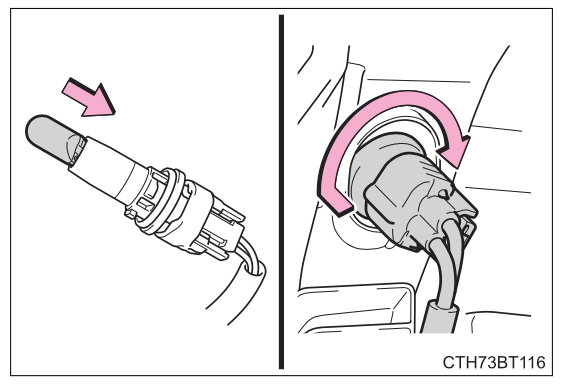
- Install a new light bulb and then install the bulb base to the light unit by inserting it and turning it clockwise.

Front side marker lights (bulb type)
- To ensure enough space to perform work, turn the steering wheel to move the front wheel away from the light bulb to be replaced.
Turn the steering wheel to the left when replacing the right side light bulb, and turn the steering wheel to the right when replacing the left side light bulb.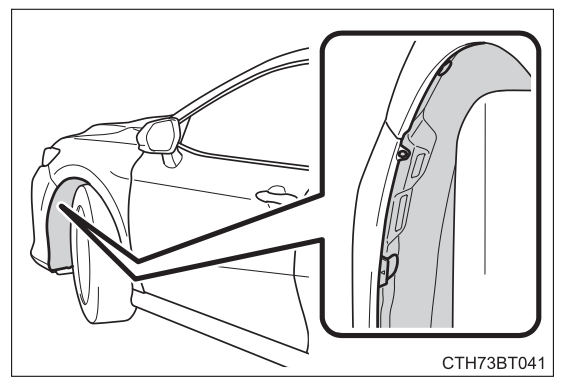

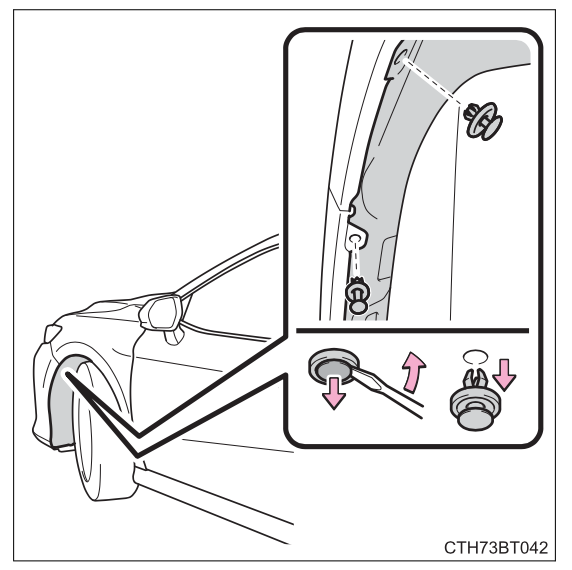
- Remove the fender liner clips.

- To protect the front bumper from being damaged, apply protective tape around the clip as shown in the illustration.
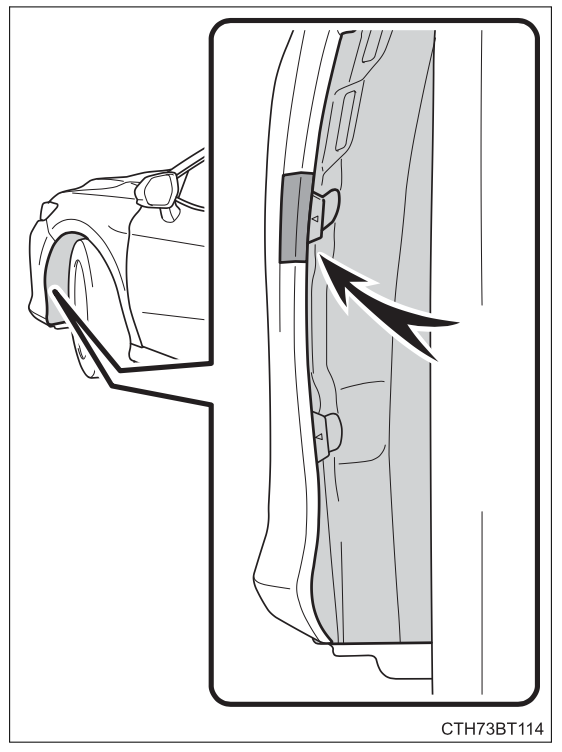
 Use masking tape, etc. Do not use duct tape, as it may leave residue or damage the paint when removed.
 - Insert a small flathead screwdriver between the front bumper and fender liner at the position marked with a “” and then separate the front bumper from the fender liner.

 To separate the front bumper from the fender liner, pry up the fender liner while pulling the front bumper outward as shown in the illustration.
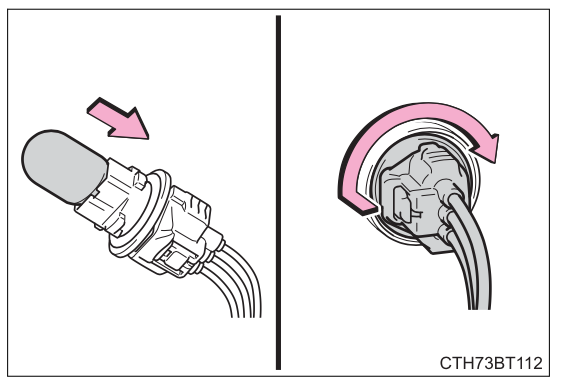
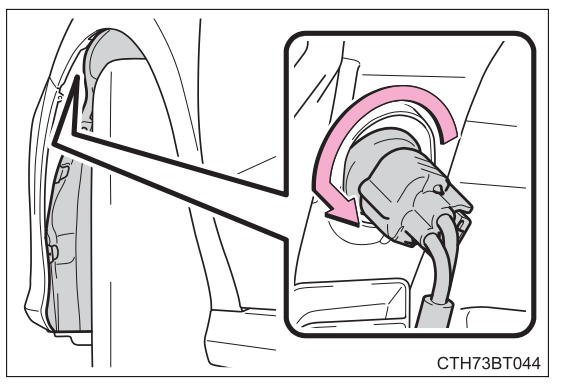
 - Pull back the fender liner and turn the bulb base counterclockwise.
- Remove the light bulb.

- Install a new light bulb and then install the bulb base to the light unit by inserting it and turning it clockwise.

- Return the fender liner to its original position, and install the clips.
Make sure that the fender liner is correctly positioned on the inner side of the front bumper.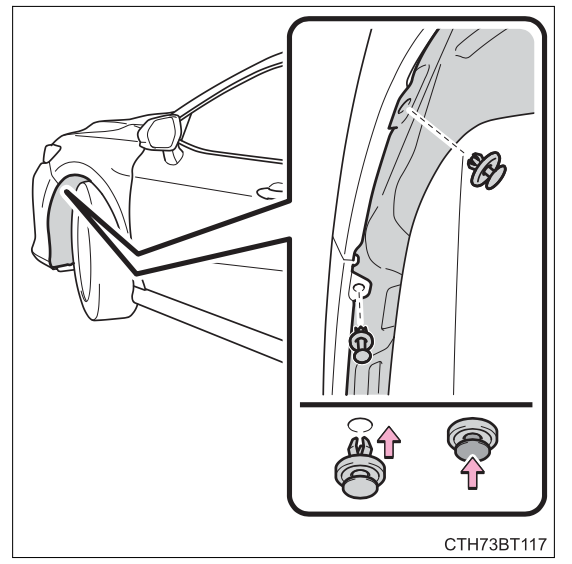

- To Install the fender liner to the front bumper, engage the clip to the front bumper.


- Removetheprotectivetape.
Rear turn signal lights (bulb type) and rear side marker lights (bulb type)
- Open the trunk and apply protective tape to the vehicle body around the light unit.
Use masking tape, etc. Do not use duct tape, as it may leave residue or damage the paint when removed.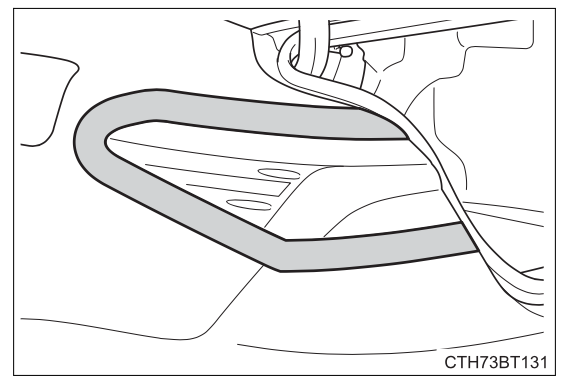

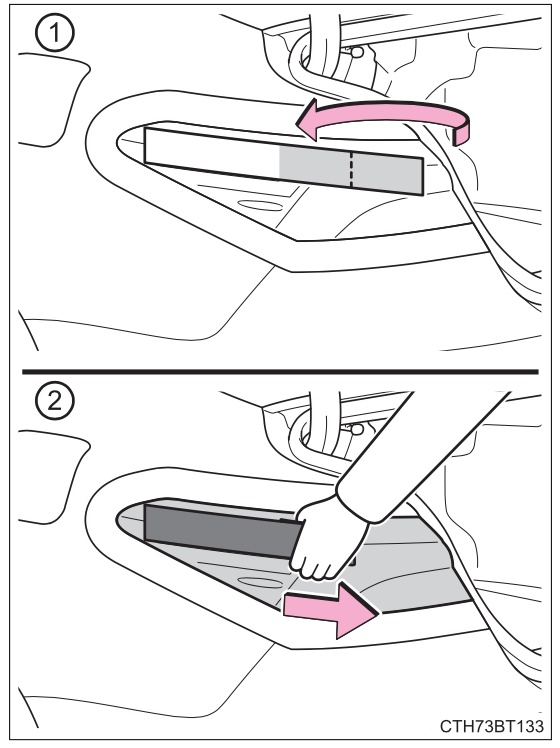
- Remove the cover.
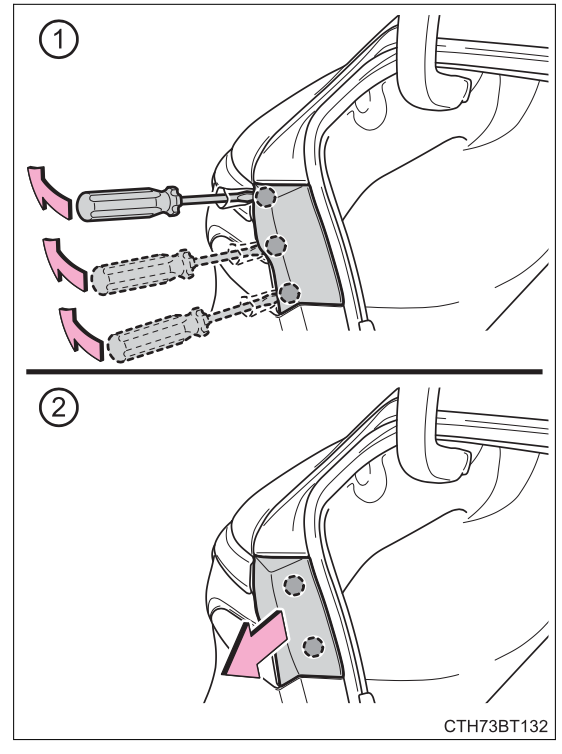

- Insert a flathead screwdriver between the cover and the light unit and pry up the cover in several positions as shown in the illustration to disengage the claws (indicated by a dotted line).
- Pull the cover toward the rear of the vehicle to disengage the claws (indicated by a dotted line) and remove the cover.
To prevent scratching the vehicle, wrap the tip of the flathead screwdriver with a cloth, etc.
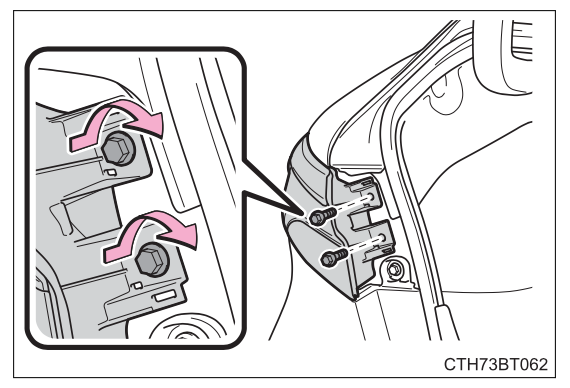
- Remove the 2 bolts.
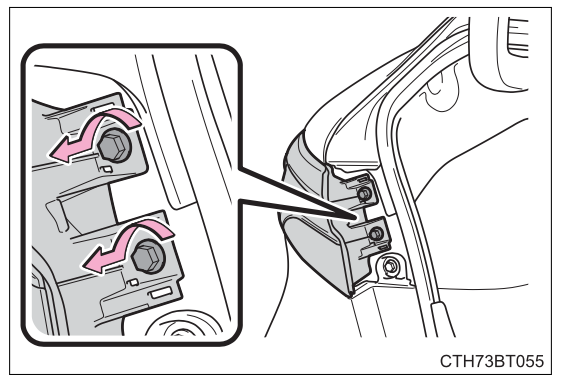

- Remove the light unit.

- Attach a long piece of packing tape to the light unit and fold the excess in half.
- Hold the folded portion and pull it toward the rear of the vehicle to remove the light unit.
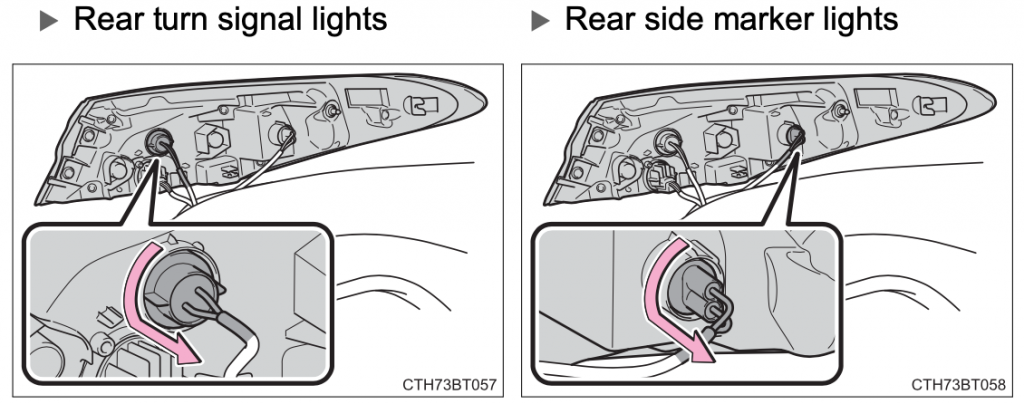
- Turn the bulb base counterclockwise.

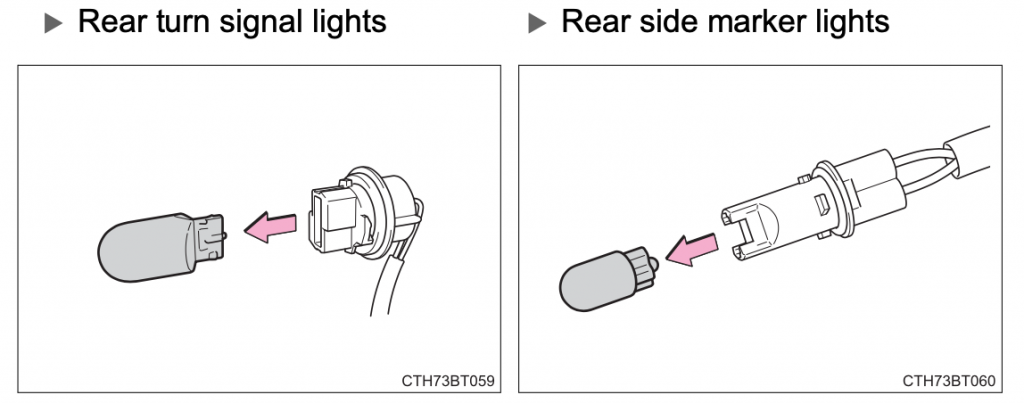
- Remove the light bulb.

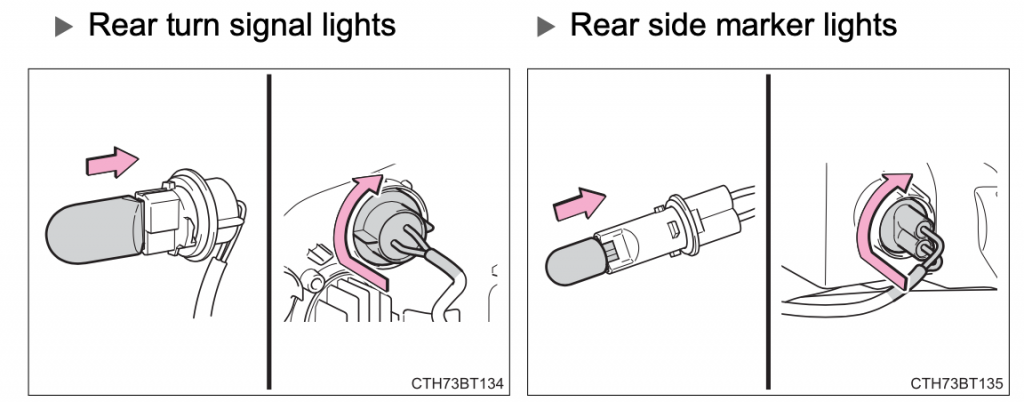
- Install a new light bulb and then install the bulb base to the light unit by inserting it and turning it clockwise.

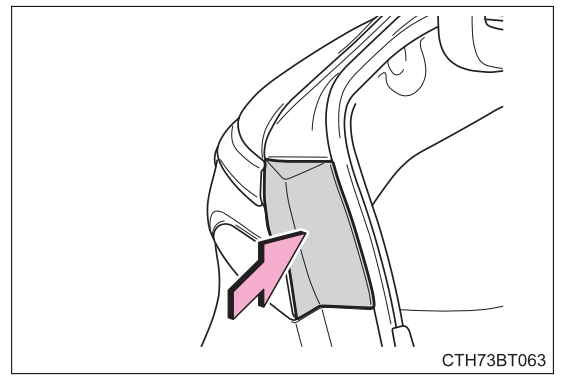
- Install the light unit.
Align the tabs and push the light unit toward the front of the vehicle to install it.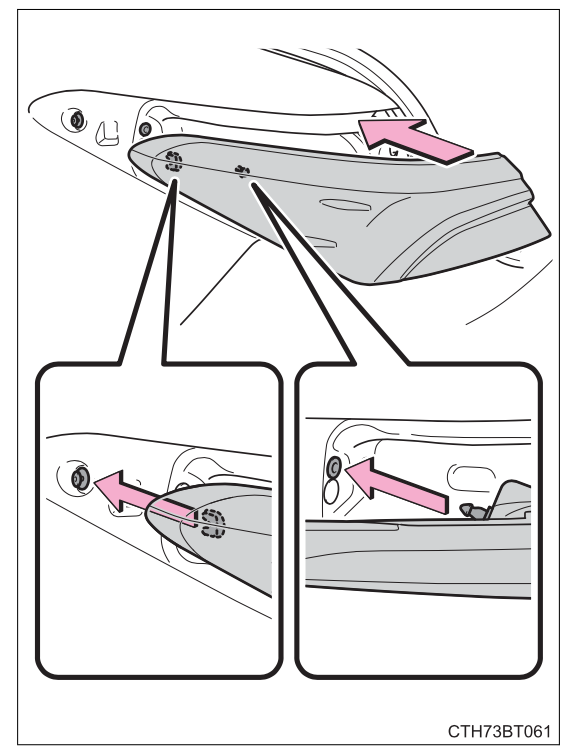

- Install the 2 bolts.

- Install the cover.

- Remove the protective tape.
Replacing the following bulbs
If any of the lights listed below has burnt out, have it replaced by your Toyota dealer.
- Headlights
- Daytime running lights
- Parking lights (LED type)
- Front turn signal lights (LED type)
- Front side marker lights (LED type)
- Side turn signal lights (if equipped)
- Tail lights
- Rear side marker lights (LED type)
- Stoplights
- Rear turn signal lights (LED type)
- Back-up lights (LED type)
- High mounted stoplight
- License plate lights
LED light bulbs
The lights other than the front turn signal/parking lights (bulb type), front side marker lights (bulb type), back-up lights (bulb type), rear turn signal lights (bulb type) and rear side marker lights (bulb type) consist of a number of LEDs. If any of the LEDs burn out, take your vehicle to your Toyota dealer to have the light replaced.
Condensation build-up on the inside of the lens
Temporary condensation build-up on the inside of the headlight lens does not indicate a malfunction.
Contact your Toyota dealer for more information in the following situations:
- Large drops of water have built up on the inside of the lens.
- Water has built up inside the headlight.
WARNING
Replacing light bulbs
- Turn off the lights. Do not attempt to replace the bulb immediately after turning off the lights.
The bulbs become very hot and may cause burns. - Do not touch the glass portion of the light bulb with bare hands. When it is unavoidable to hold the glass portion, use and hold with a clean dry cloth to avoid getting moisture and oils on the bulb.
Also, if the bulb is scratched or dropped, it may blow out or crack. - Fully install light bulbs and any parts used to secure them. Failure to do so may result in heat damage, fire, or water entering the headlight unit. This may damage the headlights or cause condensation to build up on the lens.
- To prevent damage or fire
Make sure bulbs are fully seated and locked.